Showing posts with label Win-8 OS Tricks. Show all posts

Monday, 23 December 2013

Windows 8.1 Full Features List

As you have probably heard by now, Microsoft has decided to confirm this week that it's working on a new operating system called Windows 8.1, while also revealing lots of details about it.

The purpose of this article is pretty simple: to present all the changes that Microsoft plans to bring with its next Windows release, along with a few details to help you figure out the purpose of each of them.

Before jumping into details, there's one important thing that you should take into consideration: Microsoft will launch a public preview of Windows 8.1 in late June at the BUILD developer conference. 

Given the fact that it's just a beta and the target audience is mostly made of developers, the Softies might very well change some of these features before the public version of the OS hits the market.

If previous reports are true, expect this to happen later this year, most likely just before the holiday season, as Microsoft hopes to see Windows 8.1 generating higher sales than Windows 8.

So let's see what's new in Windows 8.1:

• The Start button is back: Microsoft will make this utterly popular feature available in Windows 8.1, but instead of launching a Start Menu, it will be a shortcut for the Start Screen. It will be always visible while working on the desktop, while in the Metro UI, you will be able to access it by simply moving the mouse cursor in the lower left corner.

• The lock screen will come with many more customization features and will be able to display slideshows using photos that are stored either locally or in SkyDrive accounts. This could basically turn a Windows 8.1 tablet in a full-featured photo frame.

• The Start Screen will also provide many more tweaking options and will come with new background and color settings. In addition, users will be allowed to use the

Two Simple Tricks to Make Windows 8 Blazing Fast

Even though Windows 8 was designed to be faster than its predecessors from the get-go, we've heard that many people are actually experiencing performance issues and that the OS is actually a bit slower.
Of course, there are many ways to tweak Windows 8, especially in case you're using a desktop computer, but when it comes to tablets, things are a bit more complicated.

That's why we decided to show you two different and very simple tricks to improve the performance of Windows 8 without spending too much time tweaking things. 

Keep in mind that both tutorials are specifically aimed at tablets, including Windows RT devices, but they can very well do the job on laptops and PCs too.

They do not require advanced computer knowledge, but you must own administrator privileges on the system you're working on.

Trick #1: optimize Windows 8 for best performance

Just like its predecessors, Windows 8 comes with dedicated settings to optimize the operating system for either best performance or best appearance. 

Of course, you can always let Windows 8 choose what's best for your computer, but in case you're hoping to get a blazing fast device, “best performance” options are the right way to go.

Basically, turning on this option disables some visual effects of your Windows 8 computer, but in return, offers faster loading times and better response. The Start Screen will load quicker, while the live tiles will display information much faster.

To switch Windows 8 to performance mode, here's what you need to do:

10 Windows 8 tips, tricks and hacks -6

10. Fool the Mail app into using POP mail

The Windows 8 Mail app has a surprising shortcoming -- it won't work with email accounts that use the POP3 mail protocol. Instead, Windows 8 Mail works with Web-based mail accounts such as Gmail and Outlook.com and accounts that use IMAP.
However, there's a workaround that solves the problem. You can tell either a Gmail or an Outlook.com account to get POP3-based mail from a POP3 account, and then tell Windows 8 Mail to get mail from that account.
Configure Outlook.com to get POP3 mailOf course, you'll also have to consider whether your POP email account might contain sensitive correspondence that you don't wish to share with an additional cloud-based service. If you're willing to route your mail through Outlook.com or Gmail, keep reading for how to do it. (Skip to Gmail instructions.)
Got an Outlook.com account? You might have one without knowing it. The service was formerly called both Hotmail and Windows Live Mail at various times in its history, and those accounts have been converted to Outlook.com automatically. So if you've got an old Hotmail account, for instance, just go to Hotmail.com and log in; you'll be redirected to Outlook.com.
If for some reason your account hasn't been upgraded, just log into your Hotmail or Windows Live Mail account, click Options, select Upgrade to Outlook.com and follow the instructions. Your messages, rules and so on will be brought over.
If you don't have an Outlook.com account, sign up.
Once you're logged into Outlook.com:
1. Click the Settings icon in the upper-right of the screen, and then select "More mail settings."
2. Under "Managing your account," click "Your email accounts" and then select "Add a send-and-

10 Windows 8 tips, tricks and hacks- 5

Use the invert selection feature
On the far-right side of the Home tab, there is a group of commands called Select. The "Select all" option selects all files in a folder, and "Select none" deselects them. The third option, "Invert selection," is confusingly named but surprisingly useful.
Let's say that you've hand-selected certain files in a folder by holding down the Ctrl key while clicking them. Once you've selected them, you can perform a task on them all -- delete them or copy them or move them somewhere else, for example.
Now imagine that you've got 30 files in a folder, and you want to delete 26 of them. The obvious way to do it would be to tediously hand-select 26 of them one by one and then delete them. Here's where "Invert selection" comes to your rescue.
Select the four that you don't want to delete, and then click "Invert selection." Now all the files that you selected are no longer selected, and the other 26 are selected. You've inverted the selection, and you can now mass-delete the 26 files.

8. Use (and tweak) the All Apps screen

One of the most disconcerting things about Windows 8's dual interface is that it's difficult to see in one place all the apps you can run -- both Windows 8 Store apps and Desktop applications. You can find the Windows 8 Store apps on the Start screen, but all of your Desktop apps don't necessarily appear there. And because there's no longer a Start button on the Desktop, you can't find all of your Desktop apps there, either.
However, there's a way to see all of them in one place: Go to the All Apps screen. To get there,

10 Windows 8 tips, tricks and hacks- 4

7. Bend File Explorer to your will

Windows 8's File Explorer file manager is different from the old Windows Explorer in more than just name. It's gotten a complete makeover, notably by the addition of a Ribbon interface that puts many tasks, features and views in easy reach. Following are my favorite ways to get more out of it.
But first you need to make sure that File Explorer displays the Ribbon, because it might not be turned on. To turn it on, press Ctrl-F1 or click the downward-facing arrow on the upper right of its screen. The Ribbon displays, and the downward-facing arrow turns into an upward-facing arrow. To turn it back off, press Ctrl-F1 again or click the upward-facing arrow.
Turn panes on and off
File Explorer has several useful panes you can turn on and off. Click the View tab to find them. You'll find ways to turn them on and off on the far left-hand side of the Ribbon. Just click the pane you want turned on, and if there are options, select options from the menu that appears when you click the arrow next to the pane's icon.
The first basic choice is whether to use the Navigation pane. That's the pane on the left-hand side of File Explorer, and it's what you use to navigate through your hard disk. Click its icon on the View tab and uncheck "Navigation pane" to turn it off, or check it to turn it on. There are also

10 Windows 8 tips, tricks and hacks -3

Just below the image on the Lock screen settings screen is the "Lock screen apps" section. Here you'll find icons for the apps that automatically display notifications and updates on your lock screen.
changing lock screen apps
Click a plus sign and choose an app to display alerts and notifications on the lock screen.
Over to the right of them are several plus signs. Click a plus sign and you'll see a list of apps that can display notifications and updates. Pick one and it will display alerts and other information on the lock screen.
Note that when you click a plus sign, you'll see both the apps that are already displaying notifications and alerts on your lock screen as well as those that aren't currently doing so. If you choose one that already displays its notifications on the Start screen, nothing new happens -- the app still displays notifications, with no change. To stop an app from displaying notifications, click it and then click "Don't show quick status here."
Underneath that section is one that's a little more baffling: "Choose an app to display detailed status." The app in this

10 Windows 8 tips, tricks and hacks-2

By the way, you may have noticed that when you right-click the taskbar and select Toolbars, there are other pre-built toolbars you can put on the taskbar. Here are your choices and what each does:
Address: Adds a box on the Taskbar into which you type URLs. After you enter one, press Enter and you'll head to the site in Internet Explorer.Links: Displays your Internet Explorer favorites on the Taskbar.
Touch Keyboard: Displays a keyboard icon on the Taskbar. Click it to display an onscreen keyboard.
Desktop: Displays a list of every icon on your Desktop. It even displays some items that aren't visible on the Desktop, such as Homegroup. For any item with a subfolder beneath it (such as Homegroup and Network), you'll see an arrow next to it. Move your cursor to the arrow to see all of the subfolders beneath it.
To turn off any toolbar, right-click the taskbar and choose Toolbars, then uncheck the toolbar.

3. Use and hack the Power User menu

Microsoft giveth and Microsoft taketh away. In Windows 8 it took away the Start menu, but it also provided a very useful new tool: the Power User menu. Right-click in the lower-left corner of the

10 Windows 8 tips, tricks and hacks-1

Computerworld - Whether you've installed Windows 8 yourself or bought a new PC with it, you're now faced with an unfamiliar operating system that at first glance seems more difficult to customize than earlier versions of Windows. What to do -- give up and simply use it as it came out of the box?

Editor's Note

Always check with your IT department before changing system settings or otherwise tweaking a company-owned machine.
Certainly not. There are plenty of ways to tweak, hack and make Windows 8 do things you wouldn't think were possible. In this article you'll see how to cobble together your own quick-and-dirty Start menu as well as customize the hidden Power User menu. I'll show you how to use so-called "God Mode," hack the lock screen and Start screen, master File Explorer and much more.
So fire up Windows 8 and get ready to hear it cry "Uncle."
Need help getting up to speed with Windows 8? See our Windows 8 cheat sheet, which shows you how to get around (including with keyboard shortcuts) and offers three quick tips for getting started with Windows 8.

1. Put "God Mode" in easy reach

You wouldn't know it by looking at the Desktop or Start screen, but Windows 8 practically bristles with settings you can customize. The problem is that they're scattered throughout Windows 8, and it can be time-consuming to track them down individually.
However, there is one way to find them all in one place: You can use what some people call "God Mode." While the term "God Mode" has a powerful ring to it, the truth is it's not a separate mode that you put Windows into. It's really a hidden folder that gives you fast access to many settings spread out across Windows 8. It's easy to put that folder right on the Desktop.
First, make sure that you can view hidden files in File Explorer, the system navigation app that in earlier versions of Windows was called Windows Explorer. Run File Explorer, click the View tab, and check

Top 10 Windows 8 tips and tricks

Customize your tiles

Windows 8 tilesMake the most of your Windows Start screen tiles by adjusting the sizes, where they are located, and what is listed.
  • Move any tile by clicking and dragging the tile. While moving a tile, if you need a larger view of the Start screen move the tile towards the top or bottom of the screen to zoom out.
  • Use your mouse wheel to scroll left-to-right through your tiles.
  • Any Desktop shortcut or program can be pinned to the Start screen by right-clicking the icon and choosing Pin to Start.
  • In the bottom right-hand corner of the start screen is a magnifying glass with tiles, click this icon to get a zoomed out view of your Start screen. In this view, if you right-click on a group of tiles you'll be given the option to name group, which can be useful if you have a group of related tiles (e.g. games). In this view, you can also click and drag a group to organize your tile groups.
  • Create a new speed bump between tile groups by moving a tile to a speed bump.
  • Resize any User tile or Live tile by right-clicking the tile and choosing resize.
  • If there is a tile you want on your Taskbar, right-click the tile and choose Pin to taskbar.
  • Show admin applications on the Start screen by clicking Settings in Charms, click Settings, and change the Show administrative tools from

Deep inside Windows 8.1's hidden new features

After months of teasing and torture, the Windows 8.1 Developer Preview is finally here, ready to deliver us from many of Windows 8’s glaring flaws. You’ve no doubt already heard about Windows 8.1’s biggest new features: The Start button is back, Bing owns the Search charm, the split-screen Snap feature is customizable, yada yada yada. You know the drill.
What hasn’t been talked about much are the subtler changes—the hidden secrets tucked away in the dark corners of Windows 8.1, whispering and waiting for a turn to shine rather than shouting their proverbial presence from the proverbial rooftops.
No, these gems aren’t as flashy as Windows 8’s newfound ability to sync apps and Internet Explorer 11 tabs across multiple devices, but they’re arguably just as (if not more) handy. And there’s no way you’ll find them unless you dig deep...or read this enlightening guide.

Shut down from the Start button

Let’s start with something basic, but far from obvious.
Yes, the Start button is back...but the Start menu isn’t. So you still need to swipe through a multiclick process involving the charm bar if you want to shut down your PC—if you don’t know about the Start button’s secretmenu, that is.
Right-clicking the Start button that appears when you hover your mouse cursor in the lower-left corner of the screen brings up a bevy of powerful options, including quick links to deep stuff like Disk Management and Command Prompt tools.
Now, the menu itself isn’t new to Windows 8.1. What is new is the addition of a Shut Down option to said menu. Hovering over it for a

20 must-know Windows 8 tips and tricks

Refresh your PC

Enjoy a fresh PC without losing everything.
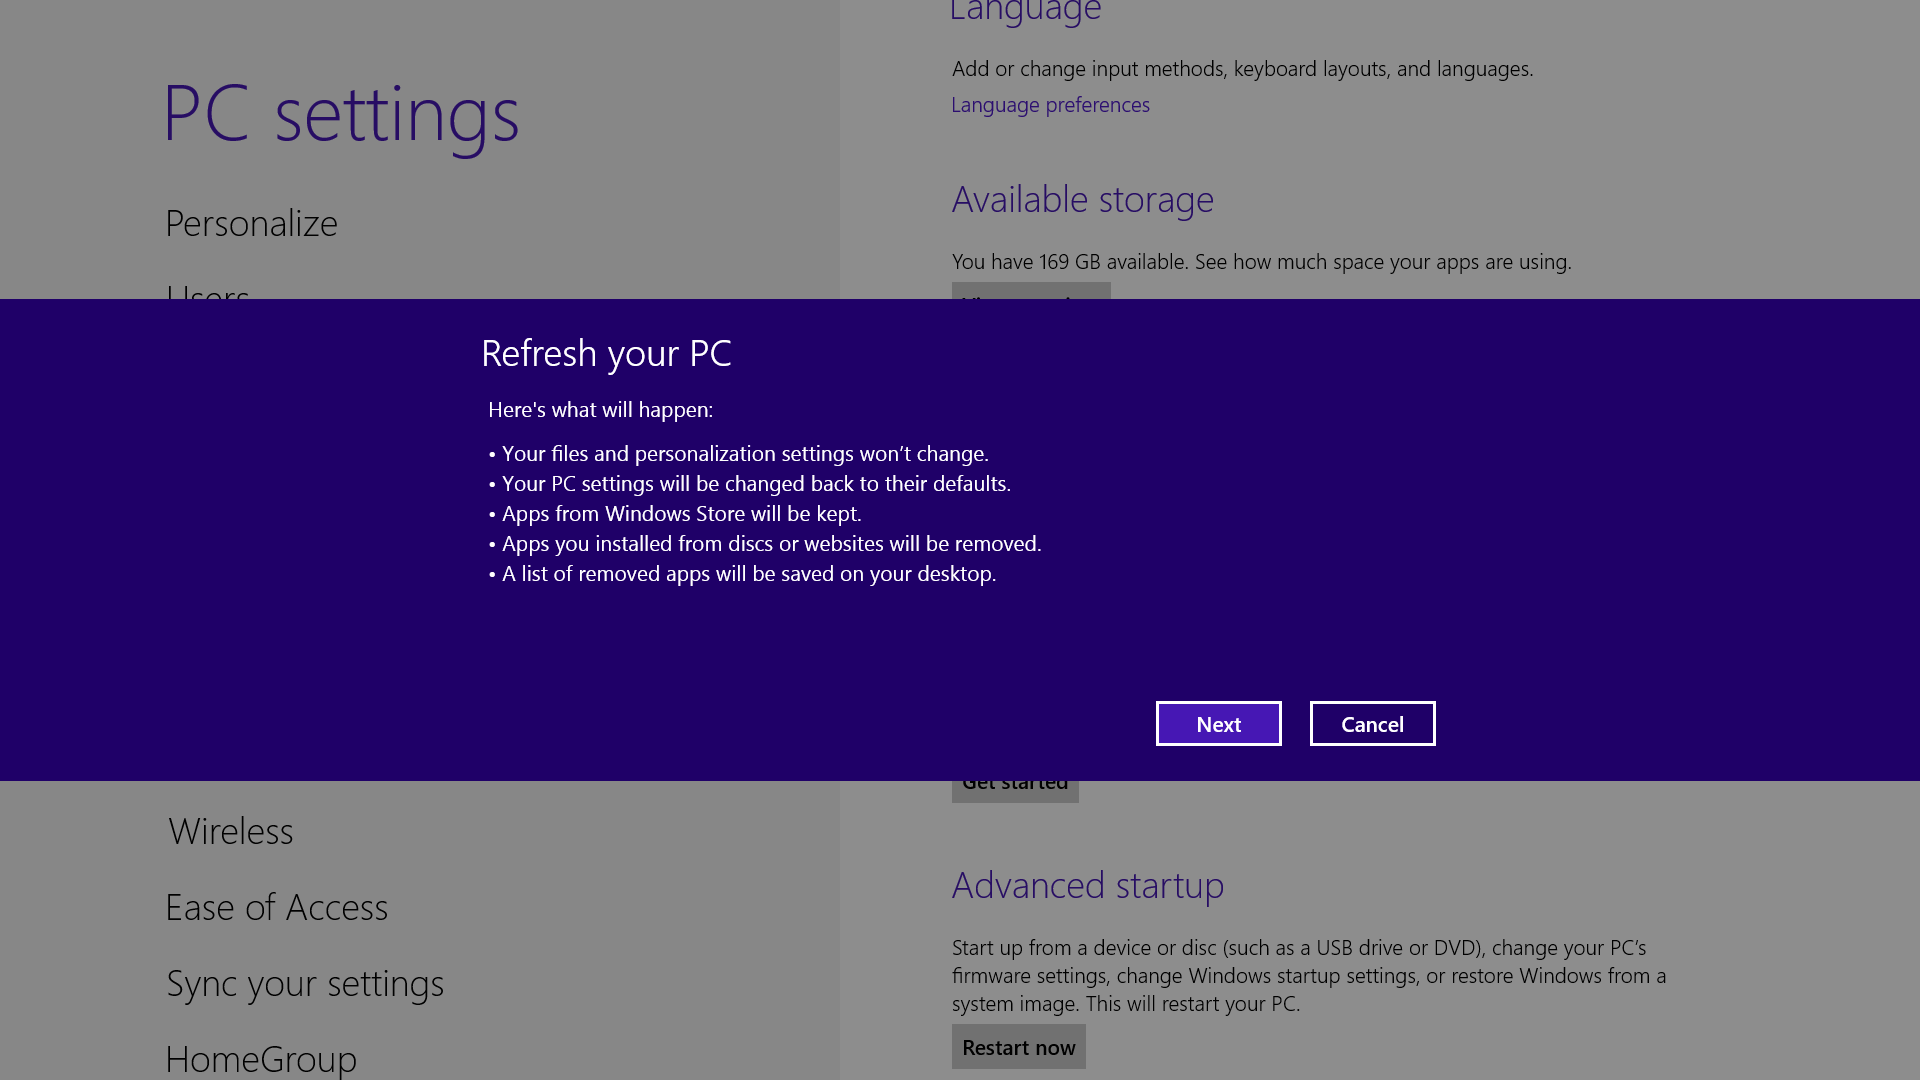
If your system is feeling a little sluggish, it may be time for a refresh. In the past we would have to find our copy of Windows 7, back up all of our data, and perform a fresh install to enjoy that back-to-factory-fresh feeling. But now Windows 8 allows you to perform a fresh install from within Windows without losing any data.
In order to perform the refresh, go to Settings and click the Change PC Settings tab near the bottom.

20 must-know Windows 8 tips and tricks

Share and share alike

Play with the Share charm in every app.
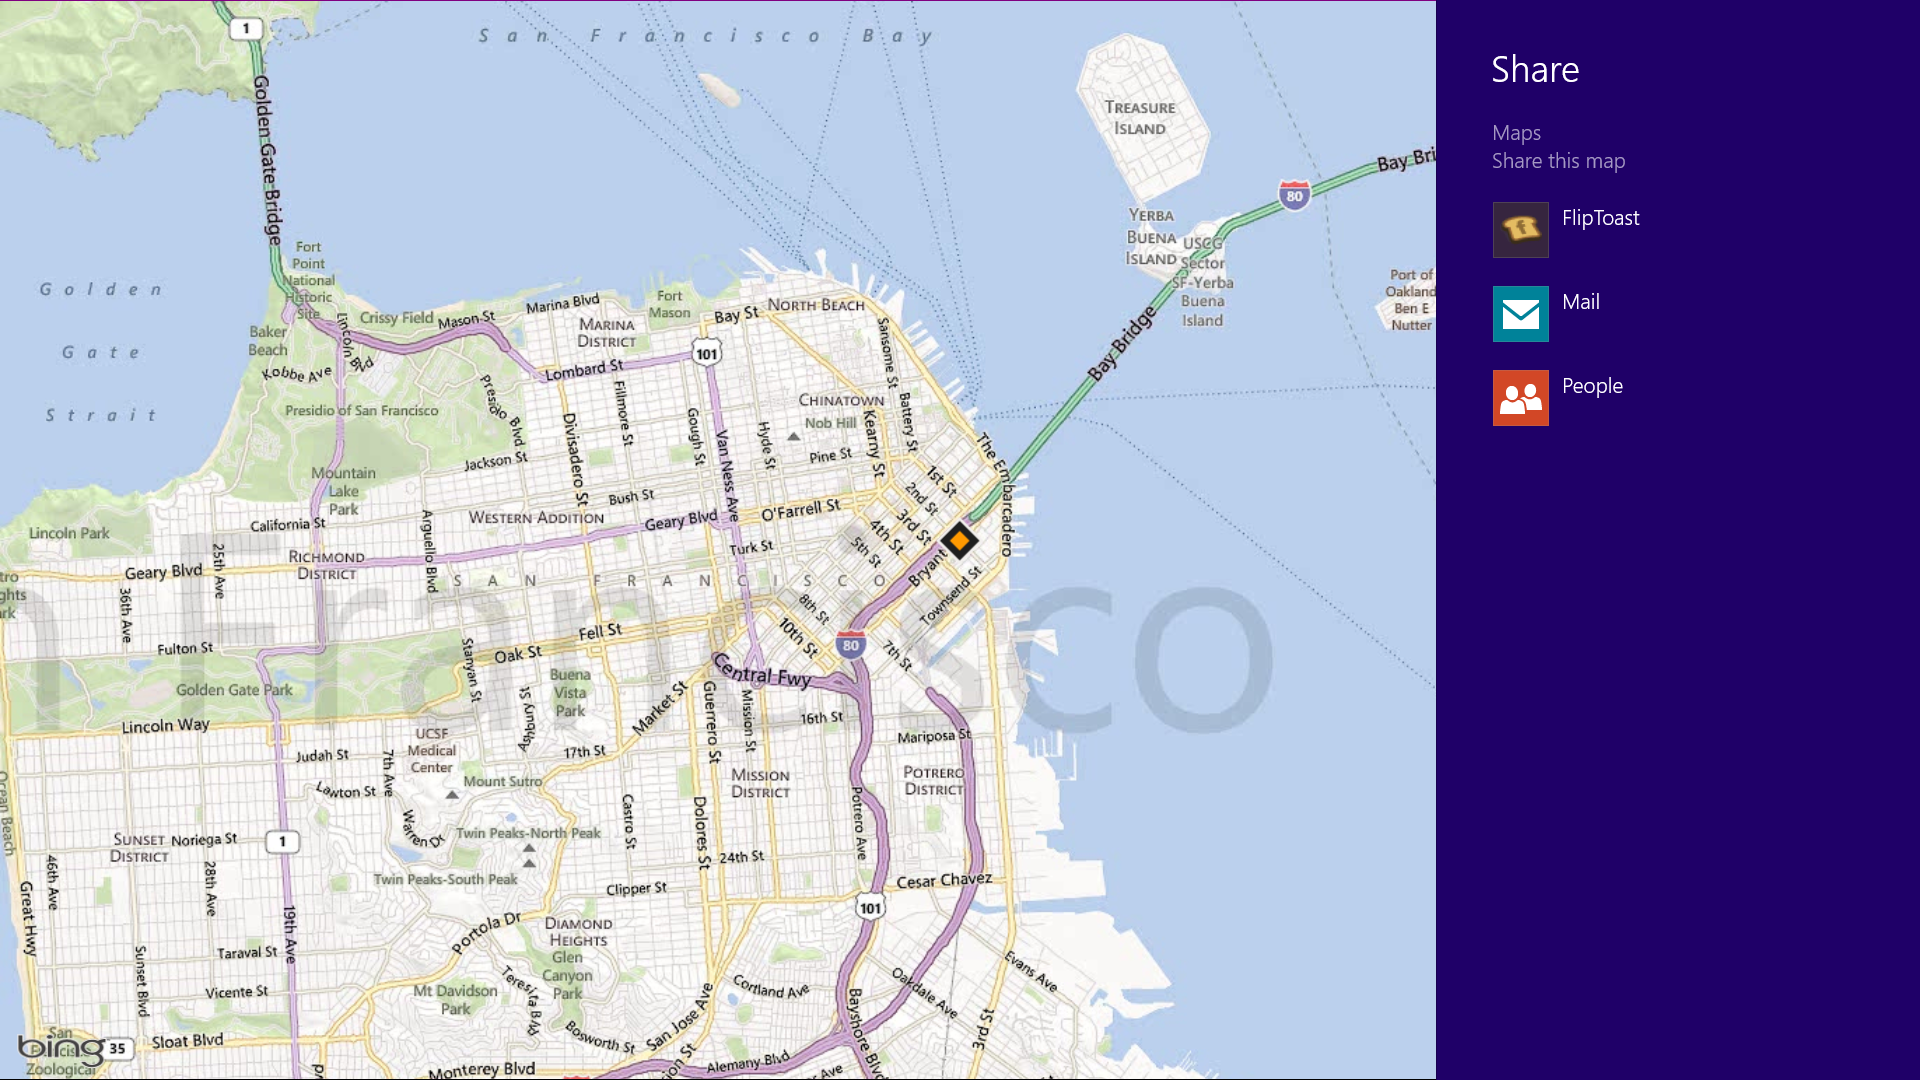
Windows 8 is Microsoft’s first social-media-aware PC operating system. Using the Share button located on the Charms bar, you can pick any number of elements from your Windows 8 Store apps—say, a location from your Maps app, a news story from the Finance app, or a even a contact from your People app—and then distribute that item to friends via other Windows 8 programs.
Perhaps most conveniently, you can quickly share a photo via email or Twitter, or to your own

20 must-know Windows 8 tips and tricks

Bring up the Quick Access Menu

The secret Start button for power users is hidden at the bottom-left.
Right-clicking on the lower left of the screen—whether you’re in the Windows 8 Start screen or in the desktop—will bring up the Quick Access Menu, which enables a direct line to many key system

20 must-know Windows 8 tips and tricks

Close an application

Closing an app sounds simple enough, but you'll quickly notice that close buttons are hard to find in Windows 8. That's because Microsoft encourages us to run apps in the background where they'll take up minimal resources, but still be accessible at any time.
Nonetheless, if you insist on being rebellious, you can close an app by dragging it with your mouse or finger from the top of the screen all the way down to the bottom. As you drag, the app will miminize into a thumbnail, and when you reach the bottom, it will disappear from view. Alternatively, you can still close apps via Alt + F4 and through the Task Manager.

Use centralized, contextual search

Search for anything in any app from one place.
The Search function located on the Charms bar is packed with power, letting you search the

20 must-know Windows 8 tips and tricks

Windows 8 is rife with features and behaviors that conspire to perplex even the most experienced PC users. Not all of them are bad, per se, but few of them are immediately intuitive. Making matters worse, the OS was primarily designed for touch control, and as a result, many mouse and keyboard commands feel like tacked-on afterthoughts.
But help is on the way.
We've assembled a list of our favorite Windows 8 shortcuts, tricks, and workarounds. Many focus on making the most of the OS on a traditional desktop PC, so if you're interested in touch gestures, please check out our article that focuses directly on the Windows 8 touch experience. Now let's start our journey of discovery with a look at easy-to-use (though often tough to remember!) Windows 8 hotkey commands.

Employ the hottest hotkeys we know